 Vitalii Holben
Visual Regression Testing in GitHub Actions (Full Pipeline)
Visual regression testing catches the UI bugs that unit tests and functional tests miss entirely — broken layouts, shifted buttons, wrong colors. Here's how to build a screenshot-based visual testing pipeline that runs on every pull request, with real code and practical advice on dealing with flaky tests.

In this guide I'll show how to set up visual regression testing in a CI/CD pipeline from scratch: from capturing screenshots via API to automated pixel comparison and failing the build when something looks off. I've hit these kinds of bugs more than once, and every time the root cause was the same: nobody checked how the page actually looked after the code changed. Visual testing fixes exactly this: it compares screenshots before and after, pixel by pixel, and highlights everything that moved.
The idea behind visual regression testing
Unit tests check that a function returns the right result. E2e tests check that a user can walk through a scenario: log in, click a button, submit a form. But neither checks how the page looks. A button might work fine but be pink instead of blue. A form might submit correctly, but half its fields are hidden behind the header. Tests are green, and the user sees a mess.
Visual regression testing works differently. The whole thing boils down to three steps:
1. Save a reference screenshot. How the page looks when everything is correct. This is your baseline.
2. After each PR, take a fresh screenshot of the same page.
3. Compare the two pixel by pixel. If the difference is above a threshold, the test fails and you get an image with the changed areas highlighted.
You're basically automating what you'd normally do with your eyes: "open the page, make sure everything's in place." Only now a script does it on every pull request.
What you need for the pipeline: three components
Three parts make up the whole process, and each one solves a single job:
1. A tool for capturing screenshots. Something needs to open the page and produce a PNG file. This can be a headless browser (Playwright, Puppeteer) or a screenshot API. I use the API because it doesn't require installing a browser in CI. More on that below.
2. A library for comparing images. It takes two PNG files (baseline and current) and compares them pixel by pixel. I use pixelmatch, an open-source library from Mapbox. It's fast and dependency-free. Playwright uses it under the hood too.
3. A CI/CD pipeline that runs everything. GitHub Actions, GitLab CI, Jenkins, whatever you prefer. The point is that on every PR, two scripts run: one captures fresh screenshots, the other compares them with baselines.
Now let's go through each component and wire them together.
Step 1: how to get a screenshot of the page
There are two approaches, and the choice depends on what exactly you're testing.
Approach A: headless browser in CI (Playwright)
Playwright lets you run Chromium right in the CI environment and take screenshots from there. It's a good option if you're testing components (Storybook, isolated React/Vue components) that run on a local dev server and don't need a public URL.
But the cost is real. Chromium is about 400 MB to download. Each running instance eats 200-400 MB of RAM. And Linux, macOS, and Windows all render fonts differently, which is the main headache. A screenshot taken on a developer's Mac won't match CI running Ubuntu, even if the page looks identical to the human eye. Because of this, baselines always need to be generated in the same environment where tests run (usually through Playwright's Docker image).
Approach B: screenshot API (no browser in CI)
Instead of spinning up a browser in CI, you send a URL via HTTP request and get back a ready PNG. Rendering happens on the API server, and the result is always the same. No font issues, no Chromium download, zero RAM usage on your CI runners.
I use this approach because while building screenshotrun I already had a Playwright-based rendering engine, and wrapping it into an API was the obvious next step.
Here's how it looks with the Screenshotrun API:
curl -X GET "https://api.screenshotrun.com/v1/screenshots/capture?\
url=https://example.com/checkout&\
format=png&\
width=1280&\
height=800&\
full_page=true&\
response_type=image" \
  -H "Authorization: Bearer sk_live_YOUR_API_KEY" \
  --output baselines/checkout.png
What's happening here: we're sending a GET request to the API with parameters for which URL to capture, what format, what dimensions. The response_type=image parameter tells the API to return a raw PNG file instead of a JSON wrapper. The --output flag in curl saves the result to baselines/checkout.png.
One request, one file. Need a mobile viewport? Change width to 390 and height to 844. Need a full page with scrolling? full_page=true is already there. The API scrolls the page on its own, waits for lazy content to load, and assembles the result.
Which approach to pick
If you're testing public pages (landing page, blog, marketing site), the API is simpler: the URL is already accessible, no browser needed in CI, font problems are solved. If you're testing internal components that only exist on localhost, go with Playwright, because the API can't reach your local dev server.
I'll show both approaches in examples below, but the main pipeline uses the API since there's less setup involved.
Step 2: how to compare two screenshots
Once you have two PNG files, baseline (reference) and current, you need to compare them. I use pixelmatch for this.
How pixelmatch works
pixelmatch takes two images of the same dimensions and walks through every pixel. If the pixel color in the current screenshot differs from the baseline, that pixel gets painted bright pink on a third image (the diff). You get two things back:
- A number. How many pixels are different.
- A diff image. A visual map of changes, where pink areas show what moved.
So if a button shifted 5 pixels to the right, you'll see a pink stripe on its left and right edges. If text changed color, the entire text block will be pink on the diff.
Installation
pixelmatch needs Node.js. Install two dependencies:
npm install pngjs pixelmatchpngjs is a library for reading and writing PNG files in Node.js. pixelmatch is the comparator itself. Nothing else needed.
Comparison script
Create a file called compare-two.js. It will compare two specific screenshots:
const fs = require('fs');
const { PNG } = require('pngjs');
const pixelmatch = require('pixelmatch');

// 1. Read both PNG files
const baseline = PNG.sync.read(fs.readFileSync('baselines/checkout.png'));
const current = PNG.sync.read(fs.readFileSync('current/checkout.png'));

// 2. Make sure dimensions match (pixelmatch requires this)
const { width, height } = baseline;

// 3. Create an empty image for the diff
const diff = new PNG({ width, height });

// 4. Run the comparison
const numDiffPixels = pixelmatch(
  baseline.data,   // pixels of the first image
  current.data,    // pixels of the second image
  diff.data,       // pink diff pixels will be written here
  width,
  height,
  { threshold: 0.1 } // sensitivity (0 to 1)
);

// 5. Save the diff image
fs.writeFileSync('diff/checkout-diff.png', PNG.sync.write(diff));

// 6. Calculate the percentage of differences
const diffPercent = (numDiffPixels / (width * height)) * 100;
console.log(`Differences: ${diffPercent.toFixed(2)}% (${numDiffPixels} pixels)`);

// 7. If differences exceed the threshold — exit with an error
if (diffPercent > 0.5) {
  console.error('Visual regression detected!');
  process.exit(1);
}
Let me break down the key parts:
threshold: 0.1 controls sensitivity at the individual pixel level. Values range from 0 (colors must be absolutely identical) to 1 (any colors count as the same). At 0.1, pixelmatch allows minor shade differences that come from anti-aliasing (font and edge smoothing). I started at 0.05 and bumped it to 0.1 within the first week. At 0.05, tests were failing on every PR from subpixel rendering noise, even though visually the page looked the same.
diffPercent > 0.5 sets the threshold at the whole image level. If more than 0.5% of pixels differ, we call it a regression. For full-page screenshots, 0.5% is a reasonable starting point. For screenshots of small components (a button, a card), I go tighter, 0.1%, because on a small image even 0.5% is a visible change.
process.exit(1) exits with an error code. In CI, this marks the step as failed and the entire pipeline goes red. That's how the test "signals" a problem.
Before running, make sure the baselines/, current/, and diff/ folders exist, and that the first two contain PNG files with matching names. Then run:
node compare-two.jsIf the pages are visually identical, you'll see something like Differences: 0.02% (312 pixels), which is normal anti-aliasing noise. If someone changed the CSS and a button shifted, you'll see Differences: 3.47% and a file diff/checkout-diff.png with the changed area highlighted in pink.
Step 3: a script for capturing multiple pages
In a real project you'll want to capture more than one page. At least the homepage, login, dashboard, and checkout. Here's a capture.js script that goes through a list of URLs and saves screenshots:
const fs = require('fs');

// List of pages to test.
// name — the filename (checkout.png), url — the page address.
const pages = [
  { name: 'homepage', url: 'https://staging.myapp.com/' },
  { name: 'checkout', url: 'https://staging.myapp.com/checkout' },
  { name: 'dashboard', url: 'https://staging.myapp.com/dashboard' },
  { name: 'login', url: 'https://staging.myapp.com/login' },
];

async function captureAll() {
  // Create the current/ folder if it doesn't exist
  fs.mkdirSync('current', { recursive: true });

  for (const page of pages) {
    // Build the API request parameters
    const params = new URLSearchParams({
      url: page.url,
      format: 'png',
      width: '1280',
      height: '800',
      full_page: 'true',
      response_type: 'image',
    });

    // Send the request to the Screenshotrun API
    const response = await fetch(
      `https://api.screenshotrun.com/v1/screenshots/capture?${params}`,
      {
        headers: {
          Authorization: `Bearer ${process.env.SCREENSHOTRUN_API_KEY}`,
        },
      }
    );

    // Save the PNG file
    const buffer = Buffer.from(await response.arrayBuffer());
    fs.writeFileSync(`current/${page.name}.png`, buffer);
    console.log(`✓ ${page.name}`);
  }
}

captureAll();
Here's what happens step by step:
1. The pages array is your list of pages to test. Each entry has a filename and a URL. As the project grows, you just add new entries to this array.
2. For each page, the script sends a GET request to the Screenshotrun API. The API key comes from the SCREENSHOTRUN_API_KEY environment variable. This matters because the key shouldn't end up in your code.
3. The API response is a binary PNG file. We save it to the current/ folder with the name from the array.
Run it:
SCREENSHOTRUN_API_KEY=sk_live_YOUR_KEY node capture.jsCheckmarks will roll through the terminal: ✓ homepage, ✓ checkout, ✓ dashboard, ✓ login. Four PNG files will appear in the current/ folder.
Step 4: a script for comparing all pages
Now you need a script that walks through all baselines and compares each one with the corresponding current screenshot. Create a file called compare.js:
const fs = require('fs');
const path = require('path');
const { PNG } = require('pngjs');
const pixelmatch = require('pixelmatch');

// Maximum allowed percentage of differences.
// Anything above this counts as a regression.
const THRESHOLD = 0.5;

// Create a folder for diff images
fs.mkdirSync('diff', { recursive: true });

// Get the list of all baseline files
const baselines = fs.readdirSync('baselines').filter(f => f.endsWith('.png'));
let hasFailures = false;

for (const file of baselines) {
  const baselinePath = path.join('baselines', file);
  const currentPath = path.join('current', file);

  // Check that a current screenshot exists for this baseline
  if (!fs.existsSync(currentPath)) {
    console.error(`Missing current screenshot: ${file}`);
    hasFailures = true;
    continue;
  }

  // Read both files
  const baseline = PNG.sync.read(fs.readFileSync(baselinePath));
  const current = PNG.sync.read(fs.readFileSync(currentPath));

  // Check that dimensions match
  if (baseline.width !== current.width || baseline.height !== current.height) {
    console.error(`Size mismatch: ${file}`);
    hasFailures = true;
    continue;
  }

  // Compare
  const { width, height } = baseline;
  const diff = new PNG({ width, height });

  const numDiffPixels = pixelmatch(
    baseline.data,
    current.data,
    diff.data,
    width,
    height,
    { threshold: 0.1 }
  );

  const diffPercent = (numDiffPixels / (width * height)) * 100;

  if (diffPercent > THRESHOLD) {
    // Regression — save the diff and mark as error
    console.error(`REGRESSION: ${file} — ${diffPercent.toFixed(2)}%`);
    fs.writeFileSync(path.join('diff', file), PNG.sync.write(diff));
    hasFailures = true;
  } else {
    console.log(`OK: ${file} — ${diffPercent.toFixed(2)}%`);
  }
}

// If any regressions were found — exit with error code
if (hasFailures) {
  process.exit(1);
}
The logic is straightforward: the script takes each file from baselines/, looks for a file with the same name in current/, and compares them. If the difference is above the threshold, it saves a diff image to diff/ and marks the test as failed. At the end, if even one test failed, the script exits with an error code (process.exit(1)), which makes the CI pipeline go red.
Example output when everything is fine:
OK: homepage.png — 0.03%
OK: checkout.png — 0.12%
OK: dashboard.png — 0.07%
OK: login.png — 0.01%
And when something broke:
OK: homepage.png — 0.03%
REGRESSION: checkout.png — 4.21%
OK: dashboard.png — 0.07%
OK: login.png — 0.01%
In that case, a checkout.png will appear in the diff/ folder with pink areas marking exactly where the page changed.
Step 5: wiring it all up in GitHub Actions
Now we need this to run automatically on every pull request. Create a file at .github/workflows/visual-regression.yml in your repository:
name: Visual Regression Testing
on: [pull_request]

jobs:
  visual-test:
    runs-on: ubuntu-latest
    steps:
      # 1. Clone the repo (baselines are stored in it)
      - uses: actions/checkout@v4

      # 2. Install Node.js
      - uses: actions/setup-node@v4
        with:
          node-version: 20

      # 3. Install comparison dependencies
      - run: npm install pngjs pixelmatch

      # 4. Capture fresh screenshots of the current version
      - name: Capture current screenshots
        run: node capture.js
        env:
          SCREENSHOTRUN_API_KEY: ${{ secrets.SCREENSHOTRUN_API_KEY }}

      # 5. Compare with baselines
      - name: Compare with baselines
        run: node compare.js

      # 6. If the test failed — upload diff images as artifacts
      - uses: actions/upload-artifact@v4
        if: failure()
        with:
          name: visual-diffs
          path: diff/
Let me walk through what each step does:
on: [pull_request] means the workflow only triggers on PRs. Not on every commit, specifically on pull requests. Visual tests are slower than unit tests (each screenshot is an HTTP request that takes 3-5 seconds), and running them on every push wastes CI minutes.
actions/checkout@v4 clones the repository. This matters because baseline screenshots are stored in the repo (in the baselines/ folder), and they need to be downloaded for comparison.
npm install pngjs pixelmatch installs the comparison libraries. Notice: we're not installing Playwright and not downloading Chromium. The API handles screenshots, and the CI runner only needs Node.js and two small npm packages.
node capture.js runs our capture script. The API key is passed through an environment variable from GitHub Secrets. For this to work, you need to add the key in Settings → Secrets and variables → Actions → New repository secret, with the name SCREENSHOTRUN_API_KEY.
node compare.js runs the comparison. If compare.js exits with process.exit(1), this step is marked as failed, and the PR gets a red X.
actions/upload-artifact@v4 only triggers if the previous step failed (if: failure()). It uploads diff images from the diff/ folder as artifacts you can download right from the PR page. Open a pink diff image and you immediately see what broke.
How to add the API key to GitHub Secrets
1. Go to your repository on GitHub.
2. Open Settings → Secrets and variables → Actions.
3. Click "New repository secret."
4. Name: SCREENSHOTRUN_API_KEY, Value: your key (starts with sk_live_).
5. Click "Add secret."
After that, the workflow can use the key via ${{ secrets.SCREENSHOTRUN_API_KEY }}, but it will never show up in logs.
Step 6: creating your first baselines
The pipeline is ready, but there's nothing to compare against yet. The baselines/ folder doesn't exist. You need to take the first set of reference screenshots and commit them to the repository.
Run capture.js locally:
SCREENSHOTRUN_API_KEY=sk_live_YOUR_KEY node capture.jsScreenshots will be saved to current/. Copy them to baselines/:
mkdir -p baselines
cp current/* baselines/
Now open each file and make sure the pages look correct. This is an important moment. Baselines must reflect the correct state of the page. If you commit a broken baseline, every future test will compare against it and won't catch the problem.
When everything looks good, commit:
git add baselines/
git commit -m "chore: add initial visual regression baselines"
git push
From this point on, every PR will automatically be checked for visual changes.
When baselines need updating
Designs change, and that's normal. You repainted a button, moved a block, updated a font. The test will fail because the page did change, but it's a planned change, not a bug.
In that case, update the baselines:
# Capture fresh screenshots
SCREENSHOTRUN_API_KEY=sk_live_YOUR_KEY node capture.js

# Copy to baselines
cp current/* baselines/

# Commit in the same PR as the code change
git add baselines/
git commit -m "chore: update baselines after checkout redesign"
The updated baselines go into the same PR as the code that changed the design. The reviewer sees both the code diff and the visual diff side by side. Everything is transparent, and there's a history of when and why each screenshot changed.
The rule I follow: updating a baseline is a conscious decision, not a way to shut up a noisy test. Every updated screenshot is worth opening and checking with your own eyes before committing.
If you're using Playwright directly (instead of the API), it has a built-in flag for this:
npx playwright test --update-snapshots --grep @visualDealing with false positives
The number one reason teams give up on visual testing is false positives. The test fails, the developer investigates, finds nothing wrong, updates the baseline, moves on. After a few rounds of this, people stop investigating and just approve everything. At that point you might as well delete the tests.
I went through this myself and figured out a few rules that help.
Fonts are enemy number one
Linux, macOS, and Windows render the same font differently. If you generate baselines on a Mac but CI runs on Ubuntu, you'll get a steady stream of false positives from font rendering alone. The fix: generate baselines in the same environment where tests run. With Playwright, that means using their Docker image for everything. With a screenshot API, this problem doesn't exist, rendering always happens on the same server.
Dynamic content is the second problem
Timestamps, user avatars, activity feeds, ad banners. Anything that changes between runs will produce diffs. Two ways to fight it:
- Mask elements. Playwright lets you pass a mask option to toHaveScreenshot(), and masked areas are excluded from comparison.
- Hide via CSS. Inject visibility: hidden for dynamic elements before capturing the screenshot.
With the API approach, you can use the selector parameter to capture only the part of the page you care about and ignore everything else. I wrote about this in a separate post on CSS selector targeting.
Animations are the third problem
If the screenshot fires in the middle of a CSS animation, the result will look different every time. Disable animations before capture with a CSS injection:
*, *::before, *::after {
  animation-duration: 0s !important;
  animation-delay: 0s !important;
  transition-duration: 0s !important;
  transition-delay: 0s !important;
}
Component screenshots are more stable than full-page ones
When you screenshot the entire page, a header change breaks every test, even if you were testing the checkout form in the center. If your tool supports it, capture specific elements by CSS selector instead of the whole page. The Screenshotrun API has a selector parameter for this. Smaller snapshot means less noise and more precise failures.
When the API approach wins over Playwright
Both approaches work. Here's when the API is more convenient:
- Public pages (landing, blog, marketing site). The URL is already accessible, no browser needed in CI, one HTTP request equals one screenshot.
- Multiple viewports. Just change width and height in the request parameters. With Playwright you'd need separate browser contexts.
- Cookie banners. The Screenshotrun API blocks them automatically. Cookie banners are one of the worst sources of false positives because they show up unpredictably.
And here's when Playwright is the better pick:
- Component testing. Storybook, isolated React/Vue components running on localhost.
- You need interaction before the screenshot. Logging in, filling a form, clicking a button.
- Playwright is already in the project. If you have e2e tests on Playwright, the built-in toHaveScreenshot() is one line of code away.
Other comparison tools
pixelmatch isn't the only option for comparing screenshots.
For Python projects, Pillow with ImageChops.difference() works on the same principle. It compares pixels and produces a diff image.
Playwright has pixelmatch built in. If you use toHaveScreenshot(), you don't need to install it separately.
If you want an all-in-one platform with cloud-based comparison and team review, those exist, and some offer free tiers. But from my experience, for a solo developer or a small team they're overkill. A simple pipeline with pixelmatch + API gets the job done, and you don't need to learn another dashboard or pay for another subscription on top.
Practical tips from running this in production
Start with 3-5 pages, not 50. Checkout, login, dashboard, homepage. That's enough for a first pass. Expand coverage once the pipeline is stable and you trust the results.
Run visual tests on PRs, not on every commit. Each screenshot is an HTTP request that takes 3-5 seconds. Four pages means 15-20 seconds. Not a big deal for a PR, but on every commit it's a waste.
Keep visual tests in a separate job. Don't mix them with unit tests. When a visual test fails, you want to see it right away, not buried in a log of 200 passed assertions.
Always look at the diff image, not just the log output. "0.73% differences" means nothing on its own. Open the diff. Maybe it's subpixel noise from anti-aliasing, or maybe a button actually moved off-screen. The number alone won't tell you.
Store baselines in Git. They're test artifacts, and they belong in the repository. Reviewing updated baselines in a PR matters just as much as reviewing the code itself.
Visual regression testing doesn't replace functional tests. It fills the gap between them. Functional tests verify the app works. Visual tests verify it looks right. Together they give you confidence that after deploy, the user sees what you intended and not a CSS accident.
If you want to go deeper, I have a post on full-page screenshots with lazy loading that covers the rendering side, one on caching screenshots to speed up your pipeline, and another on 5 situations where logs won't show the problem but a screenshot will.
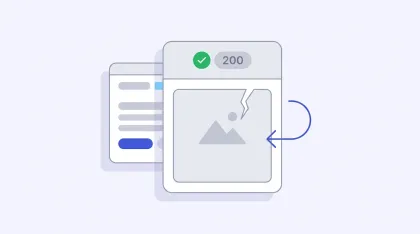
How to handle screenshot API responses in production
A 200 OK from a screenshot API doesn't mean you got a screenshot — the transport and render layers fail independently. Which status codes to retry and which not, backoff with jitter, respecting Retry-After, catching blank images that pass as a 200, and a circuit breaker. Node.js code throughout.
Read more →
Screenshot API rate limiting strategies in production
Most rate limiting guides only cover retry strategies. That's only half the problem. Five concrete strategies — proactive (token bucket, queue) and reactive (Retry-After, exponential backoff, circuit breaker) — with Node.js code.
Read more →
Headless Chrome "net::ERR_CONNECTION_REFUSED" in Docker: causes and fixes
ERR_CONNECTION_REFUSED in headless Chrome inside Docker isn't one error — it's five different network problems sharing the same message. Diagnose with one curl from inside the container, then fix per cause.
Read more →