 Vitalii Holben
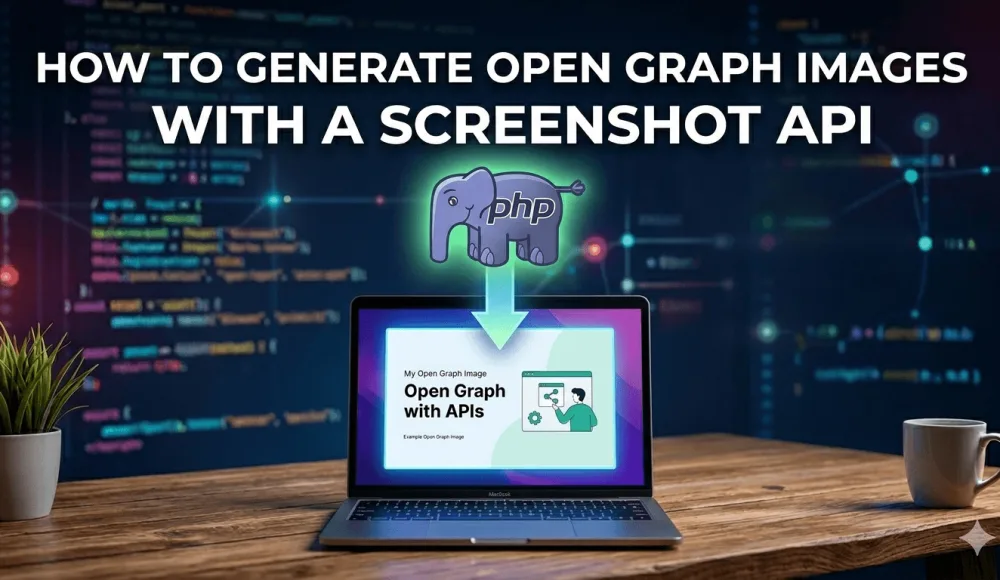
How to Generate Open Graph Images with a Screenshot API
Learn how to automatically generate OG images from HTML templates using a screenshot API. Includes code examples for JavaScript, Laravel, and curl, plus tips on caching, storage, and debugging.
I built screenshotrun to take screenshots of web pages through an API, and the most common use case I didn't expect turned out to be OG images. You know — those preview cards that show up when someone drops a link in Slack, Telegram, Twitter, or a group chat. The platform pulls a title, a description, and an image from your page's meta tags, and that image is the Open Graph image.
Without one, the platform either shows a gray rectangle or grabs whatever image it finds on the page. I've seen a 32x32 favicon stretched to fill an entire preview card. It looks like a business card printed on a napkin.
Some context on why this matters beyond aesthetics: posts with a proper OG image get around 40-50% more clicks than posts with a broken or missing preview. Twitter/X displays image cards noticeably larger in the feed, and LinkedIn renders image-based previews at roughly double the area compared to text-only links. The preview card isn't decoration — it directly affects whether people click.
The catch is that every page needs its own image. A blog with 50 articles needs 50 OG images, and an online store with 500 products needs 500. Drawing each one by hand in Figma is technically possible, but nobody actually keeps doing it past the first dozen. That's where automatic generation through a screenshot API comes in, and that's what this post is about.
The simple path first: just use your article's cover image
Before I get into API-based generation, it's worth saying that many sites get by without it. The most common approach is to grab the article's featured image and plug it into the og:image meta tag. Most CMS platforms handle this out of the box.
WordPress plugins like Yoast SEO or Rank Math do it automatically — they take the post thumbnail and drop it into the OG tags. Ghost does the same: upload a post cover, and it goes straight into the sharing preview. Notion, Medium, Substack all work the same way, picking up the first image or the cover automatically.
If you write your own code, it's just a meta tag in your template:
<!-- Just plug in the article's cover image URL -->
<meta property="og:image" content="https://yoursite.com/uploads/my-article-cover.jpg" />
<meta property="og:image:width" content="1200" />
<meta property="og:image:height" content="630" />
In Laravel with Blade:
<meta property="og:image" content="{{ $article->featured_image_url }}" />In Next.js:
<meta property="og:image" content={post.coverImage} />This covers the basics — a link shared in Telegram or Slack shows an image instead of a gray void. But a cover photo is just a photograph or illustration with no context baked in. There's no title, no logo, no branding. When someone sees the preview in a feed, they can't tell which site the article is from or what it's about. If three different blog links land in a group chat and all three have generic stock photo covers, none of them stand out.
Compare that to a branded card with the title "How to Generate OG Images," your blog's logo, the author's name, and the category label. The second version builds recognition and looks like someone actually thought about it. That's exactly what custom OG image generation gives you — a unique branded card for every page, with all the relevant data baked in, generated automatically.
How OG image generation works with a screenshot API
You create an HTML template that looks exactly like your desired OG image — fixed at 1200x630 pixels, like a poster. You inject data into it (article title, author name, date, category), then send that HTML to a screenshot API. The API opens your template in a headless browser, waits for fonts and CSS to load, takes a screenshot, and returns a PNG or JPEG. That's your OG image.
A screenshot API works like an invisible Chrome. It opens the HTML page, renders everything, and captures the result at the exact viewport dimensions you specified. The difference from a regular browser screenshot is that you control the viewport precisely — set width to 1200, height to 630, and you get an image with the exact aspect ratio Open Graph expects.
Why not just run Puppeteer yourself? You can — I wrote about the trade-offs in my screenshot API vs Puppeteer comparison. The short version: you need a server with Chrome installed, enough RAM (Chrome eats at least 300 MB per instance), crash handling, and a request queue. At 100 requests a day that's manageable. At 1,000 it becomes infrastructure work you probably don't want to maintain.
When a manual screenshot stops making sense
Fair question — you could just open the template in Chrome, hit Cmd+Shift+4 (or Print Screen), crop it, and save. For one or two pages, that's fine. But here's where the manual approach falls apart:
Page count. You have a blog with 30 articles and publish 2 new ones per week. Six months from now you're at 80+ articles, each needing its own OG image. Opening the template, plugging in data, screenshotting, cropping to exactly 1200x630, saving with the right filename — by week three you'll stop doing it, and I say that from personal experience.
Content updates. Changed an article title? The OG image no longer matches. With an API, this happens automatically: update the article, a hook generates a new image. By hand, you have to remember to redo it — and you won't remember.
Consistency. A manual screenshot gives you a slightly different viewport every time, different zoom level, maybe a scrollbar crept in, maybe the crop is off by a few pixels. The API returns the same result every time: exactly 1200x630, no scrollbars, no extra pixels.
Pipeline integration. If OG generation is part of your publishing workflow — a CI/CD step, a webhook, a Zapier or n8n flow — you can't plug a manual screenshot into that. An API call is a single HTTP request from any language. I covered a similar automation pattern in the Python screenshot tutorial where the same flow applies.
Bottom line: if you have a landing page with three pages, screenshots by hand are fine. If you have a blog, a store, or a SaaS with dozens or hundreds of pages, you need automation.
OG image requirements that actually matter
Before writing any code, here are the technical specs. Every platform behaves a bit differently, but there's a common baseline that works everywhere.
Size: 1200x630 pixels. That's a 1.91:1 ratio, and it works on Facebook, Twitter/X, LinkedIn, Slack, Discord, Telegram, and WhatsApp. If you pick one size for everything, this is the one.
Format: PNG for images with text and sharp edges, JPEG for photos or gradient-heavy designs. WebP isn't supported everywhere yet — WhatsApp and some email clients may not display it.
File size: most platforms accept up to 5 MB, but realistically you want to stay within 200-500 KB. Facebook may fail to fetch a heavy image if the server responds too slowly.
URL: absolute only. Not /images/og.png, but https://example.com/images/og.png. Platforms don't resolve relative paths.
Cache refresh: Facebook caches the OG image on first fetch. If you change the image, you need to clear the cache manually via Facebook Sharing Debugger. Twitter/X has the same behavior through its Card Validator.
One thing worth knowing about X/Twitter specifically: it supports 1.91:1, but the summary_large_image card looks better at 2:1 (1200x600). If Twitter is your main channel, keep important content in the center safe zone because X may crop the top and bottom edges.
The meta tags every page needs
For platforms to pick up your OG image, add these tags to the page's <head>:
<!-- Open Graph (Facebook, LinkedIn, Telegram, WhatsApp) -->
<meta property="og:type" content="article" />
<meta property="og:url" content="https://example.com/blog/my-post" />
<meta property="og:title" content="Article title" />
<meta property="og:description" content="Short description, 1-2 sentences" />
<meta property="og:image" content="https://example.com/og/my-post.png" />
<meta property="og:image:width" content="1200" />
<meta property="og:image:height" content="630" />

<!-- Twitter/X -->
<meta name="twitter:card" content="summary_large_image" />
<meta name="twitter:title" content="Article title" />
<meta name="twitter:description" content="Short description" />
<meta name="twitter:image" content="https://example.com/og/my-post.png" />
The og:image:width and og:image:height tags aren't required, but I'd recommend including them. Without these, Facebook makes an extra request to figure out the image dimensions and sometimes shows a small preview instead of a large one. A few extra bytes in the HTML save you from that headache.
What a 1200x630 HTML template actually looks like
This is the part I actually enjoy. Your HTML template is a mini web page sized at exactly 1200x630 pixels — no scroll, no responsiveness. A fixed-size poster that gets rendered into an image.
Here's a template I use as a starting point for blog OG images:
<!DOCTYPE html>
<html>
<head>
    <meta charset="UTF-8">
    <meta name="viewport" content="width=1200">
    <style>
        * { margin: 0; padding: 0; box-sizing: border-box; }

        body {
            width: 1200px;
            height: 630px;
            overflow: hidden;
            font-family: 'Inter', system-ui, sans-serif;
            background: linear-gradient(135deg, #0f172a 0%, #1e293b 100%);
            color: #fff;
            display: flex;
            flex-direction: column;
            justify-content: space-between;
            padding: 60px;
        }

        .category {
            font-size: 18px;
            font-weight: 600;
            text-transform: uppercase;
            letter-spacing: 2px;
            color: #38bdf8;
        }

        .title {
            font-size: 52px;
            font-weight: 800;
            line-height: 1.15;
            max-width: 900px;
            margin-top: 20px;
        }

        .bottom {
            display: flex;
            justify-content: space-between;
            align-items: flex-end;
        }

        .author {
            display: flex;
            align-items: center;
            gap: 16px;
        }

        .author-avatar {
            width: 48px;
            height: 48px;
            border-radius: 50%;
            background: #38bdf8;
        }

        .author-name { font-size: 18px; font-weight: 500; }
        .author-date { font-size: 14px; color: #94a3b8; }
        .logo { font-size: 20px; font-weight: 700; color: #38bdf8; }
    </style>
</head>
<body>
    <div>
        <div class="category">Tutorial</div>
        <h1 class="title">How to Generate OG Images with a Screenshot API</h1>
    </div>
    <div class="bottom">
        <div class="author">
            <div class="author-avatar"></div>
            <div>
                <div class="author-name">John Doe</div>
                <div class="author-date">March 18, 2026</div>
            </div>
        </div>
        <div class="logo">yourblog.com</div>
    </div>
</body>
</html>
A few details that matter here:
width: 1200px; height: 630px; overflow: hidden; locks the template to exact dimensions — it won't stretch or produce a scrollbar no matter what content you inject. I follow the same fixed-viewport principle when capturing screenshots on specific device viewports — the rule is the same: pin the dimensions and you remove a whole class of rendering surprises.
If you use Google Fonts, add the <link> in the <head>. The screenshot API will wait for fonts to load before capturing. If a font fails to load, the browser falls back to a system font, and the result won't look how you intended — I've been bitten by this a few times when Google Fonts CDN was slow.
52px works well for titles up to about 60 characters. For longer titles, you'll want to drop to 44-48px or add some JavaScript that scales the font size dynamically. And keep important text at least 60px from the edges — some platforms crop the edges slightly when displaying previews.
Making the template dynamic with query parameters
A static template is useful for understanding the concept, but in practice you need to inject different data for each page. The simplest way to do this is through query parameters — your server renders the HTML with the values plugged in.
Here's how that looks in Node.js with Express:
const express = require('express');
const app = express();

app.get('/og-template', (req, res) => {
    const { title, category, author, date } = req.query;

    const html = `<!DOCTYPE html>
<html>
<head>
    <meta charset="UTF-8">
    <link href="https://fonts.googleapis.com/css2?family=Inter:wght@500;600;800&display=swap" rel="stylesheet">
    <style>
        * { margin: 0; padding: 0; box-sizing: border-box; }
        body {
            width: 1200px; height: 630px; overflow: hidden;
            font-family: 'Inter', sans-serif;
            background: linear-gradient(135deg, #0f172a, #1e293b);
            color: #fff; display: flex; flex-direction: column;
            justify-content: space-between; padding: 60px;
        }
        .category { font-size: 18px; font-weight: 600;
            text-transform: uppercase; letter-spacing: 2px; color: #38bdf8; }
        .title { font-size: 52px; font-weight: 800;
            line-height: 1.15; max-width: 900px; margin-top: 20px; }
        .bottom { display: flex; justify-content: space-between;
            align-items: flex-end; }
        .author-name { font-size: 18px; font-weight: 500; }
        .author-date { font-size: 14px; color: #94a3b8; }
        .logo { font-size: 20px; font-weight: 700; color: #38bdf8; }
    </style>
</head>
<body>
    <div>
        <div class="category">${category || 'Article'}</div>
        <h1 class="title">${title || 'Untitled'}</h1>
    </div>
    <div class="bottom">
        <div>
            <div class="author-name">${author || ''}</div>
            <div class="author-date">${date || ''}</div>
        </div>
        <div class="logo">yourblog.com</div>
    </div>
</body>
</html>`;

    res.setHeader('Content-Type', 'text/html');
    res.send(html);
});

app.listen(3000);
Now a request to http://localhost:3000/og-template?title=My+Post&category=Tutorial&author=John&date=2026-03-18 returns the HTML with injected data. The next step is to feed this URL to the screenshot API for rendering.
The same idea works in any backend. A Blade template in Laravel, a Jinja template in Python, an ERB template in Rails — the language doesn't matter. You just need an endpoint that returns HTML with the data plugged in. If you're working in PHP, I have a separate PHP tutorial that covers the API integration part.
Sending the template to the screenshot API
Now the main part. We have the template URL, and we need to turn it into a PNG image.
Basic request with cURL
The fastest way to test is a single cURL call. I covered more cURL patterns in my cURL screenshot tutorial, but here's the core of it:
curl -o og-image.png "https://api.screenshotrun.com/v1/screenshots/capture?\
url=https://yoursite.com/og-template?title=My+Post%26category=Tutorial\
&width=1200\
&height=630\
&format=png\
&response_type=image" \
-H "Authorization: Bearer YOUR_API_KEY"
The API takes the URL, opens it in headless Chrome, sets the viewport to 1200x630, takes a screenshot, and returns the PNG. The -o flag saves the result to a file. With response_type=image you get the raw binary back directly — no JSON wrapper.
JavaScript (Node.js)
const axios = require('axios');
const fs = require('fs');

async function generateOgImage(title, category, author, date) {
    const templateUrl = new URL('https://yoursite.com/og-template');
    templateUrl.searchParams.set('title', title);
    templateUrl.searchParams.set('category', category);
    templateUrl.searchParams.set('author', author);
    templateUrl.searchParams.set('date', date);

    const response = await axios.get(
        'https://api.screenshotrun.com/v1/screenshots/capture',
        {
            params: {
                url: templateUrl.toString(),
                width: 1200,
                height: 630,
                format: 'png',
                response_type: 'image'
            },
            headers: {
                'Authorization': 'Bearer YOUR_API_KEY'
            },
            responseType: 'arraybuffer'
        }
    );

    return Buffer.from(response.data);
}

const image = await generateOgImage(
    'How to Generate OG Images',
    'Tutorial',
    'John Doe',
    '2026-03-18'
);
fs.writeFileSync('og-image.png', image);
If you're building a Node.js app, there's a more complete guide in my Node.js screenshot tutorial that covers error handling and async patterns.
Python
import requests

def generate_og_image(title, category, author, date):
    response = requests.get(
        'https://api.screenshotrun.com/v1/screenshots/capture',
        params={
            'url': f'https://yoursite.com/og-template?title={title}&category={category}&author={author}&date={date}',
            'width': 1200,
            'height': 630,
            'format': 'png',
            'response_type': 'image'
        },
        headers={
            'Authorization': 'Bearer YOUR_API_KEY'
        }
    )
    response.raise_for_status()
    return response.content

image = generate_og_image(
    'How to Generate OG Images',
    'Tutorial',
    'John Doe',
    '2026-03-18'
)

with open('og-image.png', 'wb') as f:
    f.write(image)
PHP
$params = http_build_query([
    'url'           => 'https://yoursite.com/og-template?title=My+Post&category=Tutorial',
    'width'         => 1200,
    'height'        => 630,
    'format'        => 'png',
    'response_type' => 'image',
]);

$context = stream_context_create([
    'http' => [
        'header' => 'Authorization: Bearer YOUR_API_KEY',
    ],
]);

$image = file_get_contents(
    "https://api.screenshotrun.com/v1/screenshots/capture?{$params}",
    false,
    $context
);
file_put_contents('og-image.png', $image);
That's it. A few lines in any language. The API handles the browser, the rendering, the viewport — you just send a URL and get a PNG back.
Sending raw HTML directly instead of a URL
ScreenshotRun also supports rendering HTML directly without hosting the template at a separate URL. You send the HTML as the request body and get the image back. This is handy for quick tests and simple templates where you don't want to deploy a separate endpoint.
cURL with inline HTML
curl -X POST "https://api.screenshotrun.com/v1/screenshots/capture" \
  -H "Content-Type: application/json" \
  -H "Authorization: Bearer YOUR_API_KEY" \
  -o og-image.png \
  -d '{
    "html": "<html><body style=\"width:1200px;height:630px;background:#0f172a;color:#fff;display:flex;align-items:center;justify-content:center;font-size:48px;font-family:sans-serif\">Hello World</body></html>",
    "width": 1200,
    "height": 630,
    "format": "png",
    "response_type": "image"
  }'
JavaScript with inline HTML
const axios = require('axios');

const html = `
<html>
<body style="width:1200px;height:630px;background:linear-gradient(135deg,#0f172a,#1e293b);
  color:#fff;display:flex;flex-direction:column;justify-content:center;
  padding:60px;font-family:sans-serif">
  <div style="font-size:18px;text-transform:uppercase;color:#38bdf8">Tutorial</div>
  <h1 style="font-size:52px;margin-top:20px">How to Generate OG Images</h1>
</body>
</html>`;

const response = await axios.post(
    'https://api.screenshotrun.com/v1/screenshots/capture',
    {
        html,
        width: 1200,
        height: 630,
        format: 'png',
        response_type: 'image'
    },
    {
        headers: { 'Authorization': 'Bearer YOUR_API_KEY' },
        responseType: 'arraybuffer'
    }
);

require('fs').writeFileSync('og-image.png', response.data);
One thing to keep in mind: if your HTML references external resources (fonts, SVG icons, background images), those resources need absolute URLs. Relative paths won't work because the raw HTML has no base URL to resolve against.
API parameters that help with OG image quality
Beyond width, height, and format, there are a few parameters I find myself using regularly for OG images.
Waiting for fonts and images. If your template loads Google Fonts or external images, the API needs time to fetch them before taking the screenshot. A delay parameter (in milliseconds) tells the browser to pause. I usually set 1500-2000ms for templates with web fonts — that's been enough in my experience.
# Wait 2 seconds for fonts to load
curl -o og-image.png "https://api.screenshotrun.com/v1/screenshots/capture?\
url=https://yoursite.com/og-template?title=My+Post\
&width=1200&height=630&format=png\
&delay=2000\
&response_type=image" \
-H "Authorization: Bearer YOUR_API_KEY"
Retina screenshots. Setting device_scale_factor to 2 gives you a 2400x1260 image (2x resolution), which looks noticeably sharper on high-DPI displays. The file size roughly doubles, but the quality difference on text-heavy OG images is worth it.
# 2x resolution for sharper text
curl -o og-image-retina.png "https://api.screenshotrun.com/v1/screenshots/capture?\
url=https://yoursite.com/og-template?title=My+Post\
&width=1200&height=630&format=png\
&device_scale_factor=2\
&response_type=image" \
-H "Authorization: Bearer YOUR_API_KEY"
JPEG with quality control. If file size matters — especially with photo-heavy OG images — switching to JPEG at quality 80-85 cuts the file roughly in half compared to PNG, with almost no visible difference.
# JPEG at 85% quality, ~50% smaller than PNG
curl -o og-image.jpg "https://api.screenshotrun.com/v1/screenshots/capture?\
url=https://yoursite.com/og-template?title=My+Post\
&width=1200&height=630\
&format=jpeg&quality=85\
&response_type=image" \
-H "Authorization: Bearer YOUR_API_KEY"
I wrote more about choosing between formats and tuning these parameters in the caching guide — it's relevant because cached responses with the right format save both bandwidth and API credits.
Where to store your generated OG images
Each page needs its own OG image. If all 30 articles point to the same og-image.png, every shared link in Telegram looks identical — different title and description, same image. That defeats the purpose.
The good news is that storing 30 (or 300) PNG files isn't as heavy as it sounds. A single 1200x630 PNG weighs 200-400 KB. Thirty articles is about 10 MB total, which is less than one photo from a modern phone.
I've used three approaches depending on the project size:
Local filesystem is the simplest. A public/og-images/ folder on your server, files named by article slug: how-to-generate-og-images.png, screenshot-api-tutorial.png. Nginx serves them as static files with zero load on the application. For a blog with up to 100-200 articles on a VPS, this is more than enough — and it's what I started with for screenshotrun itself.
Object storage (S3, Hetzner Object Storage) makes sense when you don't want to fill up the VPS disk or when you have hundreds of images. The image URL points to the bucket: https://your-bucket.fsn1.your-objectstorage.com/og/slug.png. Put Cloudflare in front of the bucket and you get CDN caching for free.
On-the-fly generation through a CDN means you don't store files at all — the OG image URL points to an endpoint like /og?title=..., which calls the screenshot API and returns the result. Cloudflare caches the response. The downside: the first request is slow (1-3 seconds), and if the cache clears, you spend another API credit. It works, but the first two options are more predictable.
For a typical blog, local filesystem is the winner. No extra services, files sit alongside your other static assets.
Complete OG image generation workflow
Here's how the pieces fit together in a real publishing workflow:
The author publishes an article (or updates one). A server-side hook grabs the title, category, author name, and date, builds the template URL with those parameters, calls the screenshot API, saves the PNG to your chosen storage, and writes the image URL to the database. Your page template then pulls that URL into the meta tags.
This integrates into any backend. In Laravel, you'd use a model Observer that fires a queued Job. In Django, a post_save signal. In Express, middleware or a post-publish webhook. The API call is identical everywhere: send a URL, get a PNG, save it. Here's pseudocode for the hook:
on_article_published(article):
    template_url = build_url("/og-template", {
        title: article.title,
        category: article.category,
        author: article.author_name,
        date: article.published_at
    })

    png_bytes = screenshot_api.capture({
        url: template_url,
        width: 1200,
        height: 630,
        format: "png"
    })

    save_to_disk("public/og-images/" + article.slug + ".png", png_bytes)
    article.og_image_url = base_url + "/og-images/" + article.slug + ".png"
    article.save()
Then in your page's <head>:
<meta property="og:image" content="https://yoursite.com/og-images/my-post.png" />
<meta property="og:image:width" content="1200" />
<meta property="og:image:height" content="630" />
Batch generation for existing articles
Already have 50 articles without OG images? Write a script that loops through them and calls the API for each one. In most languages that's 15-20 lines. Add a small delay between requests (200-500ms) to be polite to the API, and the whole batch finishes in a couple of minutes:
# Pseudocode for batch generation
for article in get_all_published_articles():
    generate_og_image(article)
    sleep(0.3)
Beyond the blog: OG images for SaaS, docs, and user-generated content
The same approach works for SaaS products — feature pages, user dashboards, portfolios, documentation. All of this gets shared in Slack and Discord, and all of it needs a proper preview. Generate the image once when the content is created, regenerate on updates, and you're done.
The basic template with text on a gradient is a starting point. From there you can go further: take a full-page screenshot of the actual page and use it as a background with a semi-transparent overlay, pull in SVG icons based on article tags, or set up multiple templates for different content types (blog, docs, changelog). It all renders through the same screenshot API, and the only thing that changes is the HTML template. The same technique works for other kinds of visual cards too — I wrote about generating preview thumbnails for link directories, which is essentially the same pattern applied to a different use case.
Caching OG images so you don't burn API credits
This is the part where a few minutes of thought upfront can save real money. I wrote a full guide on caching screenshots, and the same principles apply here.
The main rule: generate the OG image when you publish the content, not when Facebook or Telegram comes knocking for it. Typical generation time is 1-3 seconds, which is fine for a background job but too slow if a social platform is waiting for a response. If the platform times out, it shows a blank preview — and now you've used an API credit and gotten nothing for it.
If you do generate on the fly (via a URL like /og?title=...), put a CDN in front of that endpoint. Cloudflare or CloudFront with a Cache-Control: public, max-age=86400 header means the first request hits the API and every subsequent request is served from cache.
ScreenshotRun also caches results on its end — a repeat request with the same URL returns the cached screenshot without re-rendering, which saves both time and credits. But I wouldn't rely on that alone. Store your own copy so you're not dependent on any external cache behavior.
Debugging OG previews when something looks wrong
You've set up the meta tags and generated the image. How do you verify it actually works?
Start with the platform debuggers: Facebook Sharing Debugger, Twitter Card Validator, LinkedIn Post Inspector. Paste your URL, and they'll show which tags get picked up and how the preview renders. You can clear the platform's cache from there too.
But the most reliable test is to actually send the link to yourself in Telegram, WhatsApp, and Slack. I've had debuggers show everything correctly while the actual app cropped the image in ways I didn't expect.
Common problems I've run into:
Image doesn't update after you changed it. Cache. Clear it via Facebook Debugger, or add ?v=2 to the image URL to force a fresh fetch.
Small preview instead of a large one. Usually means the og:image:width and og:image:height tags are missing, or the image is smaller than 600x315.
Image doesn't load at all. The URL isn't accessible from the outside — localhost, VPN, firewall, or the server isn't responding fast enough.
Broken characters in the title. Non-ASCII characters in query parameters need proper URL encoding. Double-check that your template endpoint handles encoded strings correctly.
Screenshot API vs Puppeteer vs Satori vs Cloudflare Workers
There are several ways to generate OG images, and each one trades off something. Here's how I think about the options after building screenshotrun and using all of them at various points.
Puppeteer or Playwright on your own server gives you full control. You can render anything — complex CSS, web fonts, SVG, canvas. In return, you maintain a server with 1-2 GB of RAM, because Chrome likes to crash for no obvious reason. Plus you need a request queue, plus updates. I went deeper into this trade-off in the API vs Puppeteer comparison.
Satori by Vercel takes a different approach — it doesn't launch a browser at all, it renders SVG from JSX markup. It's fast and deploys easily as an edge function. The limitation: Satori understands a restricted subset of CSS. No grid, no pseudo-elements, flexbox only with caveats. For a "text on gradient" template, it's enough. For anything more complex, you'll hit walls quickly.
Cloudflare Workers with @cloudflare/puppeteer is the serverless option. Scaling is automatic, but Cloudflare's Browser Rendering is still in beta. Limits on concurrent sessions and browser lifetime can catch you off guard in production when traffic spikes.
A screenshot API — you send a URL or HTML, you get an image back. No infrastructure to manage, full CSS and JavaScript support, pay per screenshot. The dependency on an external service is the only real downside, but for OG images (generated in the background during publishing, not in real time) that's rarely a problem in practice.
For smaller projects (up to a few hundred pages), a screenshot API is the path of least resistance — you skip the infrastructure work entirely and only pay for what you use. For larger projects with thousands of pages and frequent regeneration, running your own Playwright instance may end up cheaper per image.
The whole setup, step by step
Automatic OG image generation through a screenshot API is something I set up in about a day for screenshotrun's own blog, and I haven't touched it since. The HTML template gives you full design freedom — any CSS, any fonts, any layout — and the API handles the rendering. You inject data, save the result, and move on.
The minimum set of steps looks like this: create an HTML template at 1200x630, build an endpoint that injects article data into the template through query parameters, call the screenshot API to get a PNG, save the PNG and reference it in your page's meta tags, and verify everything with Facebook Debugger and Twitter Card Validator.
If your blog or SaaS currently has no OG images, or if every page uses the same static image, this is one of those improvements where a few hours of work translates directly into more clicks on your shared links. Sign up for a free API key and try it on your next blog post.
Frequently asked questions about OG image generation
What size should an Open Graph image be?
The recommended size for OG images is 1200x630 pixels with a 1.91:1 aspect ratio. This works across Facebook, Twitter, LinkedIn, and Slack. Some platforms crop differently, so keep important content centered with padding.
Can I generate OG images without hosting an HTML template?
Yes. The ScreenshotRun API accepts raw HTML directly via the html parameter, so you can send your template markup in the API request without deploying it to a URL first.
How do I refresh a cached OG image on social media?
Use the Facebook Sharing Debugger (developers.facebook.com/tools/debug) to force Facebook to re-scrape your page. For Twitter, use the Card Validator. LinkedIn has a Post Inspector tool. Each platform caches OG images for different durations.
What image format is best for OG images?
PNG works best for text-heavy OG images because it preserves sharp edges. JPEG is better for photographic backgrounds. Keep the file size under 5 MB — most platforms reject larger files. The ScreenshotRun API supports both formats via the format parameter.
Generate OG images at scale
Get your API key — 200 free/monthFrequently Asked Questions
The recommended size for OG images is 1200x630 pixels with a 1.91:1 aspect ratio. This works across Facebook, Twitter, LinkedIn, and Slack. Some platforms crop differently, so keep important content centered with padding.
Yes. The ScreenshotRun API accepts raw HTML directly via the html parameter, so you can send your template markup in the API request without deploying it to a URL first.
Use the Facebook Sharing Debugger to force Facebook to re-scrape your page. For Twitter, use the Card Validator. LinkedIn has a Post Inspector tool. Each platform caches OG images for different durations.
PNG works best for text-heavy OG images because it preserves sharp edges. JPEG is better for photographic backgrounds. Keep the file size under 5 MB — most platforms reject larger files. The ScreenshotRun API supports both formats via the format parameter.
How to handle screenshot API responses in production
A 200 OK from a screenshot API doesn't mean you got a screenshot — the transport and render layers fail independently. Which status codes to retry and which not, backoff with jitter, respecting Retry-After, catching blank images that pass as a 200, and a circuit breaker. Node.js code throughout.
Read more →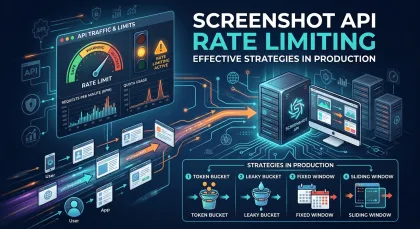
Screenshot API rate limiting strategies in production
Most rate limiting guides only cover retry strategies. That's only half the problem. Five concrete strategies — proactive (token bucket, queue) and reactive (Retry-After, exponential backoff, circuit breaker) — with Node.js code.
Read more →
Headless Chrome "net::ERR_CONNECTION_REFUSED" in Docker: causes and fixes
ERR_CONNECTION_REFUSED in headless Chrome inside Docker isn't one error — it's five different network problems sharing the same message. Diagnose with one curl from inside the container, then fix per cause.
Read more →